Drawing Specimen Diagrams for Biology Practicals

A biology specimen diagram is not a work of art and it is not a copy from a textbook; it is a record of what you actually saw when you looked at the specimen. Examiners mark diagrams for accuracy, proportion, clear labelling, and honest observation, so a simple drawing that matches the specimen scores far better than a beautiful one that invents details you never saw. Learning a few drawing rules, such as correct size, single-line outlines, and straight label lines, will improve every biology practical you do. This guide covers how to observe, draw, label, and check a specimen diagram that the examiner can trust.
Observe First, Draw Second
Spend time looking at the specimen before you pick up your pencil, because a diagram drawn from a quick glance is usually wrong in proportion and missing key features. Note the overall shape first, then the main parts and how they relate to each other, and finally the smaller details that make this specimen recognisable. If you are using a microscope, move the slide gently to see the whole specimen, and adjust the focus until the edges are sharp before you start drawing. Pupils who rush to draw often produce a diagram of what they expected to see rather than what was actually in front of them, and examiners spot that quickly.
Make a few light sketch marks to plan the size and position of the drawing on the page before committing to firm lines, since a diagram that runs off the page or ends up tiny in a corner is hard to label. Decide what magnification you are drawing at in general terms, and keep the proportions of the parts true to the specimen: a part that is twice as long as another in the specimen should be twice as long in your drawing. If a feature is unclear, look again rather than guessing, and if it truly cannot be seen, leave it out rather than inventing it. Honest observation is the foundation of every mark a specimen diagram earns.
Size, Outline, and Clean Lines
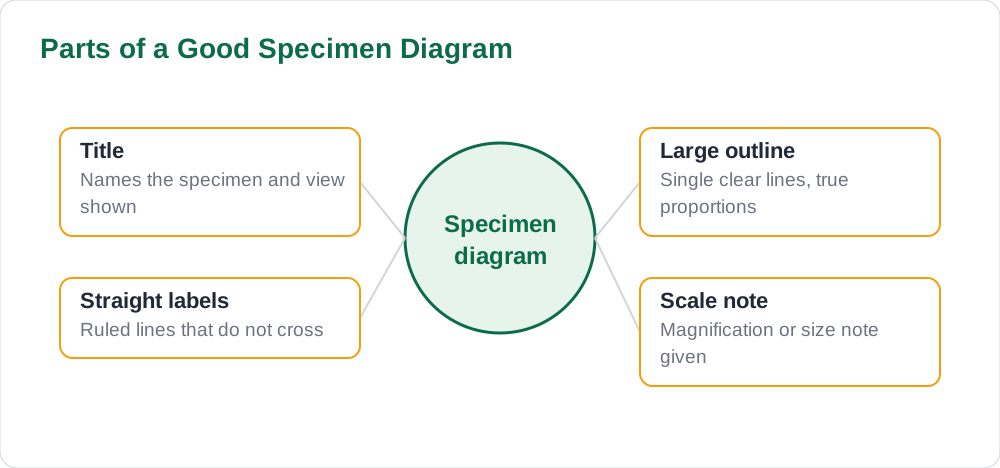
Draw the specimen large enough to label clearly, usually filling a good part of the page, because a tiny diagram cannot show detail and its label lines become tangled. Use a sharp pencil and draw outlines with single, clear lines rather than sketchy, broken strokes, and avoid shading or colouring unless your teacher specifically asks for it, since shading can hide the structures the examiner needs to see. Keep the outline smooth and continuous where the specimen's edge is smooth, and show a broken or uneven edge only where the specimen really has one. Clean lines signal careful observation, while a fuzzy outline suggests the pupil was unsure what they were looking at.
Do not draw a border around the diagram or add decorative frames, and keep the drawing area free of writing except for the title and labels. If you make a mistake, erase it cleanly and redraw the line rather than drawing over it, since double lines confuse the examiner about which edge is real. Draw only the specimen itself, not the microscope, slide, or background, unless the task asks for the field of view, and centre the drawing so there is room for labels on both sides. A large, clean, uncluttered drawing is easier to label, easier to mark, and a fairer record of your observation. For more study resources, see the solved notes and the book collection.
Labelling: Straight Lines and Correct Names
Label a specimen diagram with straight, horizontal label lines drawn with a ruler, each line touching the structure it names at one end and carrying the label at the other, without crossing other label lines. Write labels in a neat row outside the drawing, using the correct biological names for the structures, and check the spelling of each term before you finish, since a misspelt label can lose the mark for that structure. Label only the structures you can actually identify and that the task asks for; labelling every tiny detail you are unsure about risks more errors than it gains marks. If two labels would cross, rearrange the labels or the drawing position rather than accepting crossed lines.
Keep label lines evenly spaced so the labels do not crowd together, and use both sides of the drawing when there are many labels rather than squeezing them all on one side. Do not use arrows with curved or slanting lines, and do not write labels inside the drawing where they cover the structures. After labelling, read each label back to its structure along the line and ask whether the line really points to the right part, because a label pointing to the wrong structure is a common and avoidable error. A diagram with a few accurate, well-placed labels always beats a diagram crowded with hopeful guesses.
Magnification and Scale Notes
Add a magnification or scale note to your diagram whenever the task asks for one or your teacher expects it, because the note tells the examiner how large the drawing is compared with the real specimen. If you drew from a microscope, state the magnification you used, such as the objective and eyepiece combination, and if you drew a large specimen by eye, note that the drawing is not to scale or give an approximate size where you measured it. Do not invent a magnification figure: if you are unsure what magnification you used, check with your teacher or state the drawing size honestly rather than guessing a number that looks impressive.
A scale note also helps you check your own proportions, since thinking about how much larger the drawing is than the specimen forces you to compare the parts with each other. When a diagram is drawn at a stated magnification, the examiner can judge whether the proportions are plausible, which is part of the accuracy mark. Write the magnification or scale note beneath the title, where it is easy to find, and keep it short and factual. Even a simple note such as drawing not to scale, where that is true, is better than no note at all, because it shows you thought about size rather than ignoring it.
Checking Your Diagram Before Submission
Check every specimen diagram against the specimen itself before you close the notebook, while you can still correct errors from observation rather than from memory. Compare the shape, the relative sizes of the parts, and the number of visible structures with what you drew, and add or remove a feature only if the specimen confirms it. Read through the labels once more for spelling and for correct pointing, and check that the title names the specimen and the view, such as a cross section or a whole specimen, where that matters. A two-minute check at the end of the practical catches most of the errors that cost marks.
Also check the practical rules of the page: the diagram should be on the correct page for the experiment, dated, and matched by the index entry, so the examiner finds it without searching. If your teacher reviews diagrams in class, listen to their comments on other pupils' work as well as your own, since the same faults, such as tiny drawings or crossed label lines, appear again and again. Practise drawing the same type of specimen more than once across the year, and each attempt will be faster and more accurate. Good diagram skills are built by repeated, checked observation, not by a single perfect drawing. More practical guides are on the blog and the [home page](/).
AI Help: Muse AI
Muse AI is Meta's personal AI assistant, and it can help you prepare specimen diagrams by explaining how to label a drawing and what a magnification note should say. Try asking it for a labelling checklist for a biology drawing, then use the checklist while you draw from your own specimen.
Join Muse with invite code LTGSWD — in the Muse app, go to Settings > Redeem token and enter the code.
Disclosure: LTGSWD is the author's Muse invite code.
Muse AI does not give official STBB answers — always verify against your Sindh Textbook Board book and your teacher.
5 key points you must know
- Observe the specimen fully before starting to draw.
- Draw large, with single clear pencil lines and true proportions.
- Label with straight ruled lines that do not cross.
- Use correct, correctly spelt biological names for labels.
- Add an honest magnification or scale note beneath the title.
Frequently asked questions
Should I shade or colour a biology specimen diagram?
Usually not, unless your teacher asks for it. Shading can hide the structures the examiner needs to see, so a clean pencil outline with clear labels is normally the best choice.
How large should a specimen diagram be?
Large enough to label clearly, usually filling a good part of the page. A tiny diagram cannot show detail and its label lines become tangled and hard to read.
What if I cannot see a structure clearly?
Look again and adjust the focus or position first. If it truly cannot be seen, leave it out rather than inventing it, since examiners mark honest observation over guessed detail.
Why do label lines need to be straight and ruled?
Straight ruled lines make it clear which label belongs to which structure and prevent lines from crossing. Crossed or slanting lines confuse the examiner and can cost the mark for that label.
Solved notes — preview free
These guides work best with the solved exercises. Preview the solved notes free on this website — 119 solved notes for Classes 6–10 in Sindhi, Urdu, English and Arabic medium. Or browse the full solved notes catalogue for your class and medium. New solved notes are added regularly — check the catalogue for coming-soon books.